King Oyster Mushrooms: The Ultimate Cultivation Guide
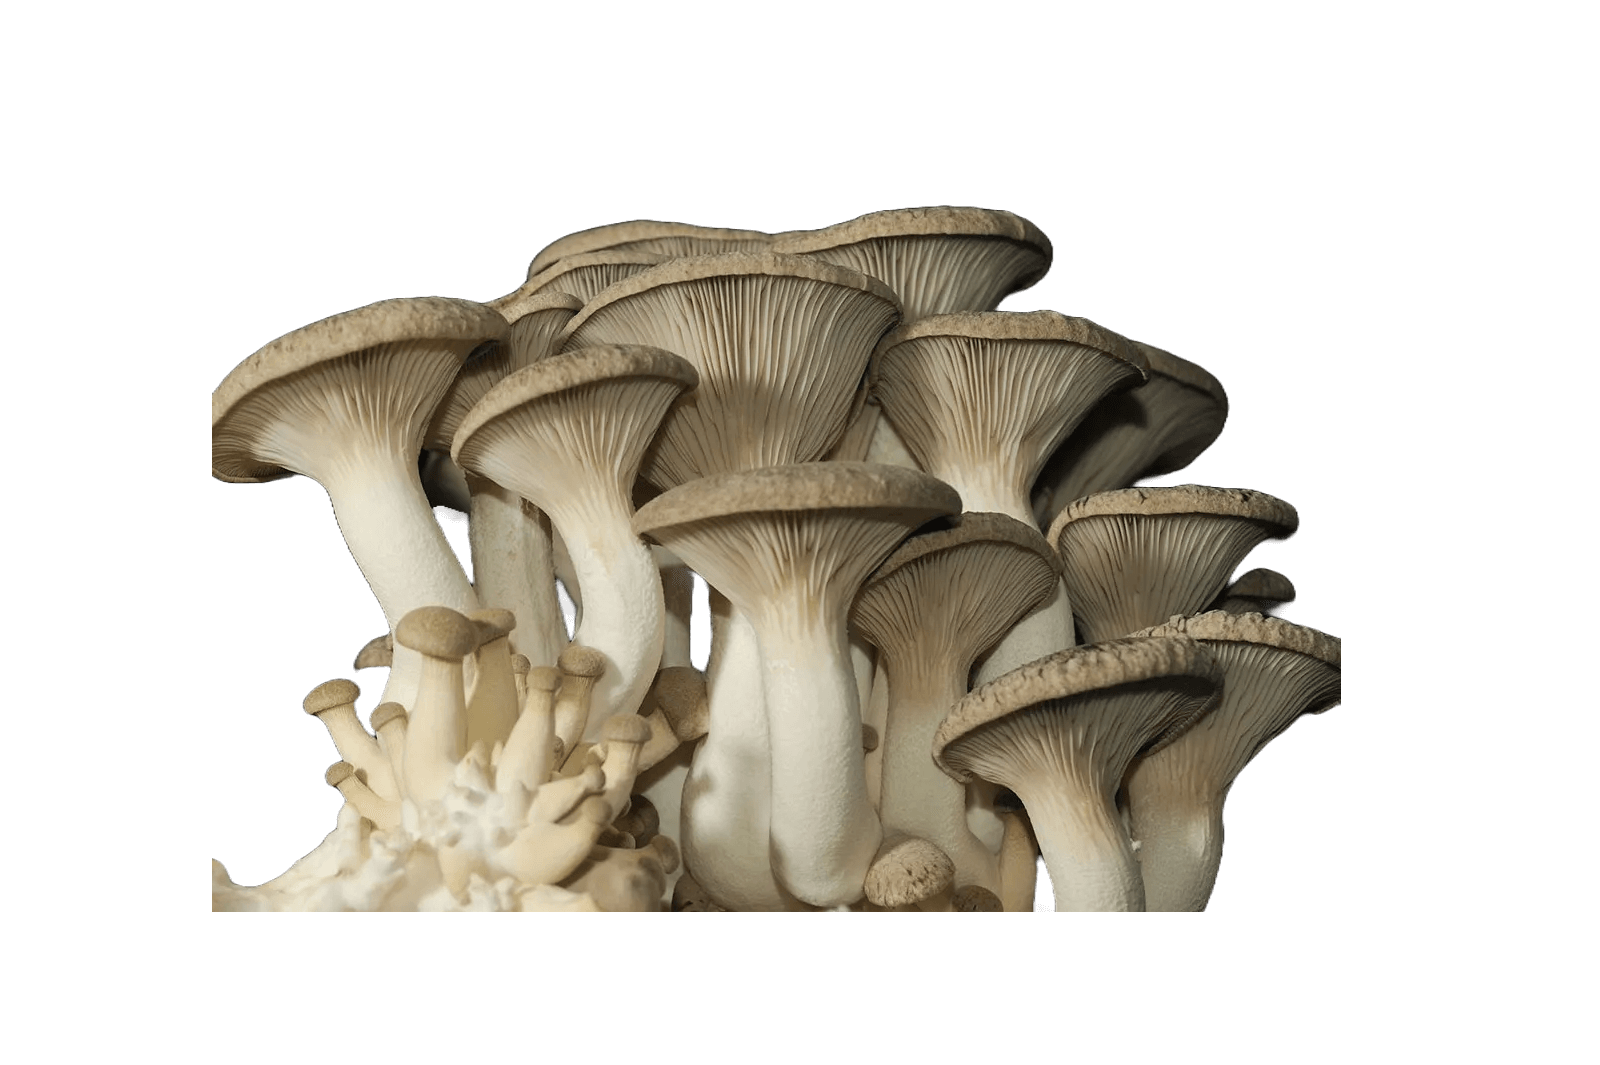
King Oyster mushrooms (Pleurotus eryngii), often called the “filet mignon” of mushrooms, are a favorite among chefs and home growers for their dense, meaty texture and savory flavor. Whether you’re a seasoned mycologist or a curious beginner, cultivating these gourmet mushrooms is a rewarding endeavor. This guide covers everything you need to know, from selecting the best spores to maximizing your yield.
Why King Oyster Mushrooms?
King Oysters stand out from other mushrooms in several ways:
- Superior Texture: Their thick, dense stems have a chewy, meaty texture, making them an excellent plant-based protein alternative.
- Rich Flavor: They have a mild umami taste that intensifies when cooked, ideal for grilling, roasting, or sautéing.
- Shelf Life: King Oysters are known for their long shelf life, staying fresh longer than most other mushrooms when properly stored.
Essential Tools and Materials
Before starting your cultivation journey, gather these essentials:
- Spores or Spawn: Use high-quality spore syringes to ensure genetic viability.
- Obtain spores from reputable suppliers like Spore Medic, which specializes in premium King Oyster strains.
- Substrate Materials:
- Hardwood Sawdust (base medium)
- Supplement: Wheat bran or soy hulls (10–20% of the substrate mix)
- Sterilization Equipment:
- Pressure cooker or autoclave
- Growing Containers:
- Mushroom grow bags with filter patches for gas exchange
- Humidity and Temperature Tools:
- Hygrometer and thermometer to monitor environmental conditions
- Light Source:
- LED lights or natural light to simulate a 12-hour light/dark cycle
Step-by-Step Cultivation Guide
1. Obtaining Quality Spores or Spawn
Start with high-quality spores to maximize your chances of success.
- Where to Buy: Reputable suppliers like Spore Medic offer high-quality spore syringes and spore prints.
- Why Quality Matters: Spores from reliable sources are more likely to yield vigorous, contaminant-free mycelium, essential for strong mushroom growth.
2. Substrate Preparation
The substrate serves as the “soil” for your mushrooms, providing nutrients for growth.
- Ingredients:
- 80–90% hardwood sawdust
- 10–20% wheat bran or soy hulls
- Moisture Content:
- The substrate should feel damp but not overly wet. When squeezed, only a few drops of water should come out.
- Sterilization:
- Pack the substrate into grow bags and sterilize in a pressure cooker at 15 PSI for 90–120 minutes. Allow to cool completely before inoculation.
3. Inoculation (Introducing Spores)
- Clean Environment:
- Work in a sterile area to minimize contamination risks. Use gloves, a face mask, and disinfected tools.
- Inoculating the Substrate:
- Inject the spore syringe into the substrate bags at multiple points for even distribution.
- Seal the bags and shake gently to distribute spores throughout the substrate.
4. Incubation
This phase allows the spores to germinate and colonize the substrate.
- Conditions:
- Temperature: Maintain 68–77°F (20–25°C).
- Darkness: Store the bags in a dark, ventilated space.
- Duration:
- Mycelium colonization typically takes 2–4 weeks. A fully colonized substrate will appear white and fluffy.
5. Fruiting (Encouraging Mushroom Growth)
Once the substrate is colonized, it’s time to induce fruiting conditions.
- Preparing the Bags:
- Cut small slits in the bags or completely remove the top to expose the substrate.
- Environmental Adjustments:
- Temperature: Lower to 50–70°F (10–21°C).
- Humidity: Maintain 85–95% humidity using a misting system or humidifier.
- Light: Provide indirect light for 12 hours daily.
- Ventilation: Ensure fresh air exchange to prevent CO₂ buildup, which can lead to malformed mushrooms.
6. Harvesting
- When to Harvest:
- Harvest when the caps are still slightly domed, and the stems are thick and firm.
- How to Harvest:
- Gently twist the mushrooms at the base or use a clean knife to cut them.
Maximizing Yield and Quality
Tips for Success
- Sterility Is Key: Contamination is the leading cause of failure. Always sterilize equipment and work in a clean environment.
- Optimize Substrate: Adding supplements like wheat bran significantly boosts yield but increases contamination risks—sterilize thoroughly.
- Maintain Proper Humidity: If humidity drops below 80%, mushrooms may develop cracks or stop growing.
- Rehydrate Between Flushes: After each harvest, soak the substrate in water for 12 hours to encourage additional flushes.
Troubleshooting Common Problems
- Contamination:
- Symptoms: Green, black, or pink patches on the substrate.
- Solution: Immediately isolate and discard contaminated bags.
- Stalled Growth:
- Cause: Temperature or humidity fluctuations.
- Solution: Adjust environmental conditions and ensure adequate fresh air exchange.
- Malformed Mushrooms:
- Cause: High CO₂ levels.
- Solution: Increase ventilation.
Storing and Cooking Your Harvest
- Storage:
- Fresh mushrooms can be stored in the refrigerator for up to 2 weeks.
- For long-term storage, slice and dry them using a food dehydrator.
- Cooking Tips:
- Slice stems lengthwise to enhance their texture.
- King Oysters are perfect for grilling, sautéing, or roasting with olive oil and herbs.
Conclusion
Cultivating King Oyster mushrooms is a satisfying blend of art and science. By starting with high-quality spores from trusted suppliers like Spore Medic and following this step-by-step guide, you’ll be well on your way to producing delicious, gourmet mushrooms. Whether you’re growing them for culinary experiments or to deepen your appreciation for fungi, King Oysters are an excellent choice for any mycological enthusiast.

